When Did That Happen?

image

Several nights ago I walked into the bathroom and wondered why I could feel the cold floor only on my heels.   Then I looked down and realized that my hand-knit socks were completely worn.    These are the second pair of socks I’ve ever knit and the hole is too big to bother with mending.  I’ve only used these socks for lounging around the house and I don’t have pets so I don’t have any idea on how this happened so quickly.   Is this a bad thing?

NO!  I get to knit more socks!  Sock knitting is one of those things you either really enjoy or really dislike and I happen to like it so it’s a fine thing to add to my 2014 “list” of things to tackle/attempt this year.  I’m still not completely sold on the idea of a big year-long/monthly challenge, but I am still keeping tabs on few things I really want to get into. 

I used to keep a master list of different projects to complete, but I found that list quickly became overwhelmingly long.   I mean I drool over most of the projects in knitting magazines and craft books! 

“Oh, can I please have almost every scarf ever designed?” 

“Don’t make me choose!”

“Put pages 1-100 on the to-do list!”

However, I find carefully choosing specific craft goals just as overwhelming.  To get out of that rut I’ve been in since the end of last year, I’m just going to let go of the listmaking for a while and just go with the flow.  Let the crafting ideas take me wherever they take me!

– Nizzy

When Did That Happen?

Knitting Punishment?

I feel like I’m on knitting punishment.  I told myself not to start any new knitting/crochet projects until I tied up some of the loose ends (literally) on some previously started projects.  I’m so bored with them all.  Part of the fun with crafting is starting something new!  It’s past time to get out of finishing mode and have a bit of fun with starting a few new projects.   I should really stop beating myself up about it the starting/finishing deal.

Speaking of finished projects, for that friend of a friend that just had a baby, I knitted the Baby Moc-a-Soc Booties.  These fall a bit into the ‘UGH’ category because of the twisted, grey yarn.  That crinkly yarn makes the stitches look so messy to me!  I would love to give them another try with something different.

image

And I am disappointed to find more yarn of this type in my stash.  I’m going to grin and bear it and see if I can make it into something I like better.   I like a challenge and apparently punishment!

I promise you this is also a sewing blog!  I’ve got a dress waiting to be photographed if only I can get the hem to work out.  I made a mistake in my pattern adjustments which doesn’t look like I can easily fix…without taking something apart!  Say it ain’t so!

I’ll leave you with a jewelry FO.  When I made this some time ago I found inspiration in the Steampunk movement, using gears and copper color.    It’s not all-the-way Steampunk, but it still has a little of that unconventional and irregular feel.

-Nizzy

Knitting Punishment?

Studio Redux

I have been a very naughty girl. 😦

I have let my studio turn to crap. I know, 40 lashes with a wet noodle.

Below is a collage of what you see when you walk into my Studio. That thing with the purple case on it? Yeah, that USED to be my lovely, lovely island.

Forgive me, I didn’t want this to be a photo-intensive post, so I made a collage in Picasa.  However, I wanted the collage to have the ability to blow up each picture, when clicked on, for a larger view.  I don’t think it does that and I haven’t figured out how to do it.  Sorry.  😦

Studio Collage by bluedragonwillow
Studio Collage, a photo by bluedragonwillow on Flickr.

Working from left to right, top to bottom:

First pic:  What you see as you first come into the Studio.  You can see my sewing machine in the background (it’s the brown mess with the TV on it).

Second pic:  The “Cutting Station” (to the left of the entry door). This is SUPPOSED to be where I store my Cricut, trimmers, etc. Yeah, it hasn’t quite gotten that far yet.

Third pic:  The top of my Island (which I can NEVER seem to keep clear) and in the background, my “office” area.  You can’t see the desk, but that’s probably a good thing.

Fourth pic:  Island Cubbies.  See, the original intent was to have them all nice and neatly filled with paper, embellishments and albums.  Well, my paper organizers didn’t fit into the cubbies and I did a whole “stash and dash” thing to get other crap out of sight!

Fifth pic:  Back corner.  You can barely see the closet door in the back right.  That closet, currently, is the bane of my existence.  It’s a long (runs the length of the “Paper Wall”), reach-in closet that is to serve two purposes; store office/school supplies, and craft supplies that aren’t “every day”  Right now?  It holds crap.  A children’s table & chairs set (in pieces), leftovers from my aunt’s “estate”, all kinds of other crap.  It’s driving me nuts!

Sixth pic:  My Jewelry Cabinet.  Yep, I make jewelry from the stuff that I cram in there.  It’s amazing I find anything.

Seventh pic:  What you see as you look into the closet.  See those shelves?  Yeah, I thought they were awesome at first too.  Seriously, not so much.  Flimsy and not very functional.  But I have a plan… 😉

Eighth pic:  More closet.  To show you that it goes back.  That’s not even a full shot.  Too embarassed to show that mess.

Ninth pic:  The Paper Wall.  All that paper was supposed to fit in the Island Cubbies.  But, of course, those Crop-in-Style organizers don’t FIT in the %&$* cubbies.  Hence, the wall.

Tenth pic:  The entrance door.  Yeah, that’s a paper bag elephant my son made in like 2nd grade.  He’s currently in 7th.  I think I need to upgrade my “display”.

Eleventh pic:  Close up of my sewing machine.  It needs a little love.  Built in the  60s, it’s not very “pretty” and the drawers are all wonky (not to mention some hardware is missing).  I’m debating about trying to paint it.  Still on the fence.

Twelfth pic:  Close up of my “desk”.  It’s actually a French Provincial Vanity that my aunt gave to my sister, who then gave it to me.  I *heart* it.  I’ve had to strip the paint off of it (it was chipping and I’m pretty sure it was lead-based).  I loved the “shabby chic” finish it wound up with, so decided to leave it, rather than paint.  I should have put some sealer on it, because it’s a little stained from cups and such.  But I plan to “clean” it again and definitely seal it.  Can’t decide whether to leave it, stain it or paint it.  Hopefully something will come to me.  It has a matching chair, but it needs some love too.  I had originally stripped it and stained it, but the stain wasn’t very even (or pretty).  I’m trying to figure out how (IF!) I can remove the stain.  Cross your fingers for me

And there you have it, my NIGHTMARE of a Studio.  Stay tuned to see what I have planned for the space (and what I actually accomplish)

~DW
Studio Redux

Nailed It! (Not Really)

image
LOL!!!

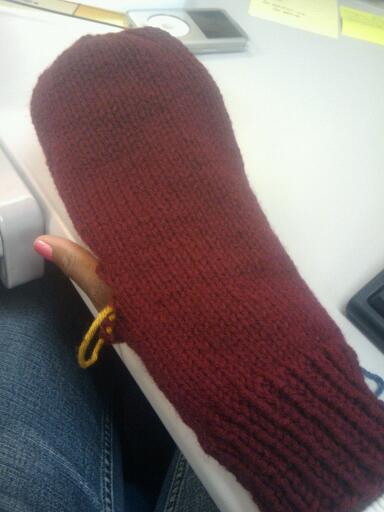
Last year I was excited about making something comfy, cute, and warm to wear on my feet in the office.  This is not what I envisioned.

THESE THINGS ARE HUGE!  And so laughably bad!   I should have known something was wrong when I had to wash these things about about 4 times just to get them to really felt.  Was I paying attention to the yarn gauge when I made the substitution? 

It turns out I wasn’t.   I said: “Hey! I have some feltable yarn in the stash!  I’ll just use that.” And I ran with it.  What a beginner mistake!  *slaps forehead*  And that’s how I ended up with my feet looking like they are being swallowed by a pile of felted fabric.

I will give them credit for keeping my feet warm and my socks from getting dirty, but I have plans to try these again.  And with the right sized needles and yarn this time.

-Nizzy

Nailed It! (Not Really)

UGH!: Charming Cape

from Vogue Knitting’s 25th Anniversary Issue

I fell into deep likingness with this cape and many other projects in the 25th anniversary issue.  I thought it was quite charming with just a touch of elegance, very aptly named.  It looked easy enough and it was also very quick to knit.  I started in November 2008 and I could say with confidence that I finished all the pieces by the end of the year.  All that was left was the seaming and weaving in ends. 

 
And that took about 3 years to finish.
 
Last night I attached the last piece (the collar) and tried it on and I did not like anything about it.  The collar is just ugly, honey.  It’s kind of too big.  The side seams are droopy and I can not figure out if it is due to improper seaming, how it fits on my body, or a combination of the two.  And I don’t love the look enough to do anything to make it work.
 
FROGGED! 
UGH!: Charming Cape

Shaped Placemats

image

UGH!

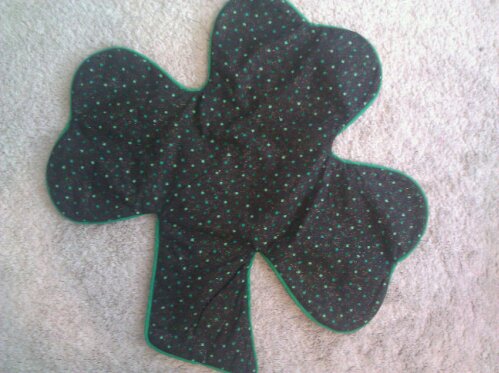
Some time ago, okay, YEARS ago, I had an idea that I wanted to make shaped placemats for each major holiday in each month.   I started just around St. Patrick’s Day so a clover was the obvious choice. 

I dove right into this project.  I drew a heart, photocopied it, enlarged it, and put three of them together to make a pattern for a clover with three leaves.  I bought cord and seam binding to make my own piping.  I took the time to make sure the piping edge was still visible in all the corners as I was pinning.  I even added matting to give it some uumph.  

I made the first one, then proceeded to lose interest in the whole project idea.  It’s been on the bottom of my unfinished project basket since forever and I think it’s now time to move it to its new home: the trash.

-Nizzy

Shaped Placemats